Cilantro Lime Chicken Taco Salad

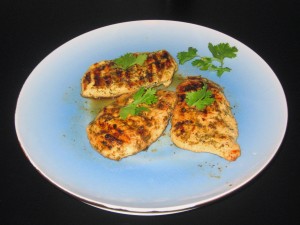
Cilantro Lime Chicken

Cilantro Lime Chicken

  • Romaine Lettuce
  • Tortilla chips
  • Cilantro
  • Limes (2)
  • Sour Cream
  • Shredded Cheddar Cheese
  • Tomato
  • Salsa (or try mine!)
  1. Combine about 1 cup of cilantro, juice of two limes, 1 tblsp of lime zest, 1 tsp of sour cream, 2 pinches of salt and a pinch of sugar in food processor or blender. Process until smooth.
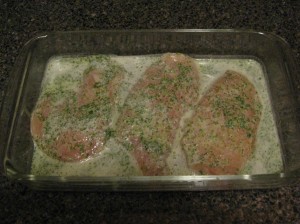
  2. Pour marinade over chicken and let sit for 15-30 minutes.
Who knew RAW chicken could look this good?!

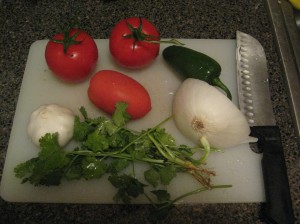
While that is marinading, begin making your salsa (or salad, if you are not feeling that motivated). To make the salsa, you’ll need:

  • 2 vine ripe tomatoes
  • 1 roma tomato
  • 3 cloves of garlic
  • 1 hot pepper like Jalapeno or Hobanero
  • 1 cup of white onion
  • 1 can of tomato paste
  • 2 pinches of salt
  • Small handful of cilantro
  • 1/4 tsp or more of cayenne pepper
  • A squeeze of lime juice

This is enough salsa to feed a party, or the entire Osmond family.

"...my salsa makes all the pretty girls dance..."

"...my salsa makes all the pretty girls dance..."

  1. Combine ingredients on pulse in food processor until to your liking. I like my salsa more watery than chunky, so I let it go a little longer than a minute. If you like chunky, a couple pulses should be fine.
  2. Let it sit in the fridge for an hour if you can, it’ll get better the longer it sits!
  3. Cut up tomato and tear the lettuce, DON’T cut! Cutting will make the lettuce turn brown faster, and no one likes to eat brown lettuce. Remember you eat with your eyes FIRST!
  4. Crush half a ziplock bag of tortilla chips and add to salad.
  5. Throw chicken on the grill for 5 minutes on each side, basting the chicken while it cooks.
  6. Serve separate or combined, and enjoy. Feel free to add other delicious taco toppings like avocado,onions, chopped jalapenos, hot sauce or sour cream.
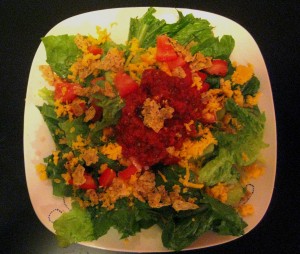
Taco Salad

Taco Salad

    Leave a comment

    Filed under Recipes

    Wanna get baked?

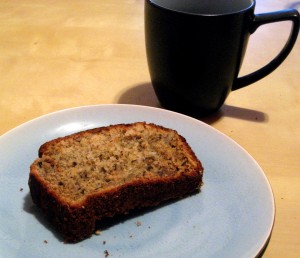
    Best Banana BreadBanana Bread

    This banana bread turned out incredible and I do not bake! While I can throw in a little of this and a dash of that  cooking and create something incredible, baking is a different story entirely. Baking requires exact measuring, adding ingredients in a certain order and patience which I lack in general, but especially with baking.

    Although the recipe is very straightforward, here are a couple tips that helped me (and they forgot to mention):

    • Mix the wet ingredients and dry ingredients seperately, then combine them. Once they are combined, then do your add-in’s to the dough like walnuts, chocolate chips or both–go big or go home.
    • About halfway through cooking, put tin foil over the top of the bread. It will keep it from getting too dark on top, but this will also increase your cook time. Speaking of which….
    • The cooking time is definitely closer to 50-60 minutes, than the 45 minutes they claim. liars.

    And if at first you don’t succeed, don’t worry. I did succeed at first, and then proceeded to burn it beyond recognition the next time. Cut off the parts you can save and enjoy, if you can.

    And if it’s so burnt there is nothing to do, get creative. Burnt bread makes an excellent paperweight, gift for those passive aggressive neighbors or weapon when heaved in the direction of your enemies. Remember, variety is the spice of life.

    Leave a comment

    Filed under Recipes

    Improving Grandma’s Recipe

    Obe Won Ken-Child-obi

    Julia "Obe Won" Child/Kenobi

    “The only real stumbling block is fear of failure. In cooking you’ve got to have a ‘What the hell?’ attitude.” – Julia Child

    Several weeks ago, I went to Pinch & S’Mac , a place in NYC specializing in pizza and mac and cheese with a twist. Offering a variety of cheeses, veggies and meats paired with my favorite  comfort food made the whole experience seem inexpensively gourmet. But still not cheap enough to eat as much as I crave.

    So with a craving and a what the hell attitude, I attempted to jazz up things with my mac and cheese. Rather than devouring it immediately as usual, I decided to try something different, but not drastic. I merely transferred the dish into the oven. I set the broiler and anticipated how good my version would be.

    Culinary FAIL

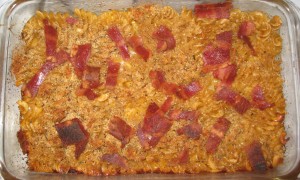
    ...looks can be deceiving...

    Despite how good this looks, I can still taste it now and I’m dry heaving a little. Yes, it was that bad. The sauce became globs of rubber, buried beneath pasta as crispy as the bacon on top.  I couldn’t even cut the damn thing with a  steak knife and I made a butt load of it too. So I was stuck with an unsatisfied craving and a bunch of pasta I would not want to eat again.

    So in the words of Ms. Child, what the hell? And, how do I not do that again?

    Perhaps, by doing layer(s) of pasta, sauce, milk and shredded cheese; adding more pasta after the shredded cheese? My theory is the extra liquid may help keep the pasta from drying out and the added cheese could make tht ooey-gooey effect when cutting into it.

    Or, perhaps by simply broiling the pasta for less time?

    …ideas? suggestions? failures of your own?

    3 Comments

    Filed under Recipe FAIL

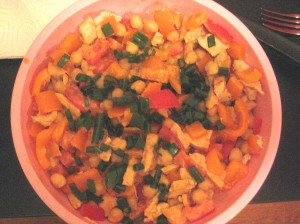
    “You’re Hot, then you’re Cold” Spicy Garbanzo Chicken Salad

    Eric, my resident taster, likes it hot.

    I like it cold.

    …and someday, I’ll ask Katie Perry what she thinks.

    Here is what you need.The list may look long and therefore automatically difficult, complicated and too hard. You are wrong, wrong, wrong. Take 10 minutes at the grocery store to pick it up and 20 minutes to make it and you’ve got a real 30 minute meal for 4 under $30.  Some are fearful of such a recipe they are exploring other careers…

    Do you see the fear in her eyes? How about the alcohol?

    Rachel Ray

    Here’s what you need:

    • 2 Cans of Garbanzo Beans
    • 1 1/2 Red, Yellow or Orange Bell Peppers
    • 2 Tomatoes, or 1 Beefsteak (the ginormous ones)
    • Green Onion
    • White Onion
    • Garlic
    • Chicken
    • Cayenne Pepper
    • Cumin
    • Dry Yellow Mustard
    • Nutmeg
    • Paprika
    • Olive Oil
    • Soy Sauce
    1. Chop 1/4 of white onion and mince one clove of garlic in soup pot with just enough olive oil to coat the bottom of the pan.  Cook until softened on medium high heat.
    2. Stir in 1/2 tsp of cayenne (or less if you don’t like SPICY–I mean it!), 1/2 tsp paprika, 1/2 tsp cumin, 1/4 tsp dry yellow mustard and a shake of nutmeg.
    3. Add frozen chicken breast and enough water to cover the chicken. Boil uncovered for 10 minutes or until mixture reduces and thickens.
    4. Remove chicken from pan and drain remaining liquid into processor or mixing bowl. Add 2-3 spoonfuls of sour cream and soy sauce to thicken mix.
    5. Pour dressing over cut up tomatoes, bell peppers, chicken and garbanzo beans. Top with green onions and serve. Unless you are Eric, in which case, put it on a plate and microwave it for a minute and a half; or heat it in the soup pot from before for several minutes on medium heat until hot.

    Serves 4

    IMG_1298

    1 Comment

    Filed under Recipes

    Micro “machine”— Leading the Way!!!

    Much like the rantings of John Moschitta, Jr. about the speed and small size of planes, trains and automobiles,  The MicroPlane (featured below) is an incredible investment that grates, minces and literally pulverize whatever you put to it in a quick, ridiculous (and mini) fashion–except much less annoying. Besides small sizes and the name plane, the greatest thing they share in common is the effort needed to use them which is about as exhusting as moving a MicroMachine from one end of the table to another.

    Yes, ladies and gentleman: it helps you make your food better while being as lazy as you usually are. If that alone does not prove why its the perfect invention than allow me to give you even more reasons:

    • fresh Parmesan cheese
    • instant minced garlic
    • lemon zest (omg amazing when added to teas and meals)
    • lime zest (omg as amazing as lemon)
    • AND…it’s hand held so you can put it over the plate of food. You use only the amount that you need, which $ave$ money! Plus, no having to take out a large greater for a little bit of flavor. Really, how much lemon zest does a dish need?!

    I’d go on, but I fear I could go into a Billy Mays-like rant. Imagine what he could do…

    Leave a comment

    Filed under Kitchen Supplies 101

    Spicy Peanut Chicken Stir-Fry

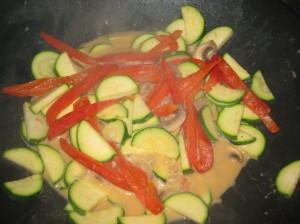
    IMG_1263This meal satisifies those cravings for Thai/Asian food without the grease or price of take-out. I love using fresh zucchini, red and yellow bell peppers and mushrooms, but canned waterchestnuts or celery add a nice crunch.
    Peanut Sauce

    • 3 spoonfuls of unsweetened Peanut Butter
    • 1 spoonful of Tahini
    • 3 tblsp Soy Sauce
    • 1 tblsp Hot Sauce (I use Crystal, if you use something strong mix together and add more to taste)
    • 1/4 c. water
    • 1 tsp Rice Vinegar
    • 1/4 tsp honey
    • 1/2 tsp dry mustard
    • 1/4 tsp red pepper–again, this is pretty spicy. Add more or less to taste)

    Mix together in food processor or by hand until well blended.  Add a spoonful of sauce to the chicken breast and set to broil. I use frozen chicken which I let cook for 20 minutes at 350 straight from the freezer and then broil at the same temperature on the lower over rack for another 15 minutes. If not using frozen chicken, apply the sauce around 10 to 15 minutes of being in the oven.

    Stir Fry!

    • Vegetables
    • Fresh Garlic
    • Chicken Stock: An excellent alternative to oil when sauteing veggies (or stir-frying in this case)!

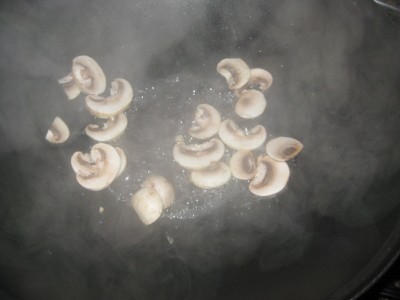
    Grate or finely chop 1/2 a clove of garlic into non-stick wok or skillet. Add 1-2 tblsp of chicken stock and let cook for a few minutes at low or 250 degrees for a minute or two. You will smell the garlic and at that point will add the mushrooms. Let them cook for several minutes brown slightly.

    IMG_1257

    Add the bell peppers and zucchini along with several spoonfuls of the peanut sauce and 1-2 tblsps more of chicken stock. Let the veggies cook for several more minutes or until the zucchini becomes slightly transparent.

    IMG_1258

    Serve stir fry over brown rice and place chicken on top. Top with sauce, some green onions if you have them and enjoy!

    Leave a comment

    Filed under Recipes

    Grandma’s Homemade Mac & Cheese

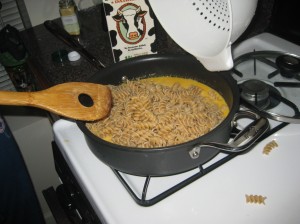
    Grandma's Mac and Cheese

    Grandma's Mac and Cheese

    I love mac and cheese like a fat kid loves cake. I have tried every boxed variety, and nothing compares to my grandma’s recipe. Every week during my summer stays with her, we would sweat together in the kitchen making this dish. While it takes a couple extra minutes more than adding milk, butter and powder to pasta, the result is a creamy, homemade taste that satisfies those blue box blues. Kraft can kiss my…apron.

    Here’s what you need:

    • 2 tblsp butter
    • 2 tblsp flour
    • 1/2 cup milk (I use 1%)
    • 1/2 tsp dry mustard
    • 1/2 block of sharp cheddar cheese, shredded
    • Salt & Pepper to taste
    • 1 box cooked rotini pasta, 3/4 if broiling, or just enjoy lots of sauce

    Optional:

    • 1/3 cup Parmesan cheese
    • 1/2 tsp paprika

    Step 1: Take large saucepan and melt 2 tblsp butter over low/medium heat. Add flour and mustard and mix until butter takes on a thicker, milkier appearance.

    Sauce base (aka: a roux)
    Sauce base (aka: a roux)

    Step 2: Add milk, 1/4 cup at a time into the heated pan. Increase the heat VERY slightly. The milk needs to bubble NOT boil. Like this:

    IMG_1247

    Step 3: Begin to add the shredded cheese, constantly stirring.  It will be normal for your sauce to look like, or slightly more disturbing than this.

    IMG_1248

    Yes, I know that it looks like a total potentially regurgitated mess. Trust me, just keep stirring. The cheese will be melt, the lumps will disappear and voila, you have cheese sauce, almost.

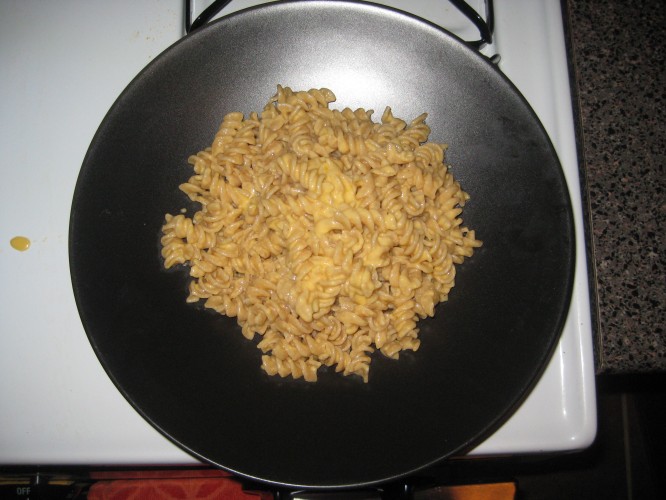
    Step 4: Let the sauce begin to bubble (again, not BOIL) a little bit, stirring occasionally every minute or two. This will allow the sauce to thicken up. After five minutes, add your pasta to the saucepan and mix.

    IMG_1251

    ENJOY!

    Or…if you enjoy a casserole style Mac and Cheese, broil the mac and cheese in an oven-safe dishes  with 1/3 c. Parmesan cheese and 1/2 tsp. paprika spriknled over the top.  Cook at 450 degrees for 3 to 5 minutes, or until brown.

    4 Comments

    Filed under Recipes

    Not yo’ momma’s BLT: BST^2

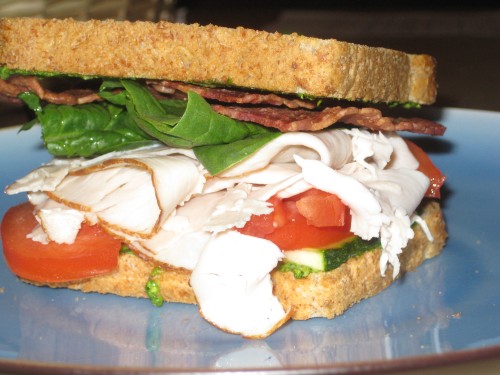
    Are you salivating yet? Is yo'momma?

    Are you salivating yet? Is yo'momma?

    The BST^2, featuring bacon, spinach, tomato, turkey and pesto,  is not for those with back pain, heart palpatations or motion sickness. It is for those who want the ultimate thrills and chills for their pallet.

    Here’s what you need to make a party in your mouth:

    • 2 pieces of  whole wheat bread
    • 3 slices of turkey
    • 2 pieces of turkey bacon (or regular)
    • 3 slices of tomato
    • A couple leaves of spinach
    • Pesto (see previous blog for recipe, or use store bought)
    • Optional: couple slices of raw zucchini–gives a nice, cold crunch

    Toast bread and cut up veggies. Smear pesto on each piece of toast then stack zucchini and spinach. Fold the turkey pieces in half and then half again.  Then, add tomato and bacon.

    Strap on your lap belts, hold onto your safety restrains and try not to scream with delight from every bite.

    1 Comment

    Filed under Recipes

    Presto Pesto!

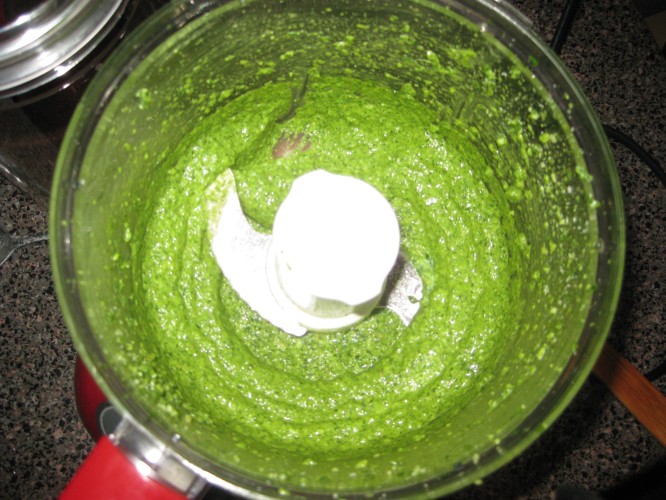
    Spinach Pesto

    Spinach Pesto

    Ingredients:

    • 3 handfuls of spinach
    • 2 tblsp of olive oil
    • 6 or 7 walnuts
    • 4 heaping tsps of Parmesan cheese

    Crucial Step 1: Add oil to food processor. It will make sure that your pesto becomes a smooth mixture rather than a dry, lumpy mess of spinach, nuts and cheese. The oil will also make sure you do not burn out the motor of your processor; trust me on this one.

    Step 2: Add the spinach and process for 3 to 5 seconds

    Step 3: Add walnuts and cheese, scrape down bowl and blend into smooth mixture.

    You can store the pesto in the fridge and it use it on eggs, sandwiches, pasta or by itself. It can store for at least a week in the fridge, although it never lasts that long in mine–I’m highly addicted to it!!!

    Leave a comment

    Filed under Recipes

    My friend, Foil

    He’s shinny. He’s silver. And he makes an excellent astronaut helmet.

    Foil is the ultimate in kitchen necessities and the shrimp of the kitchen.You can bake it, grill it, wrap it, seal it, cut it, cut yourself on it,  heat it–unless its a microwave or perhaps shape it into a foil animal like a goose. Foil is an essential piece to everyday cooking despite the fact you cannot eat it. A baked potato without foil is a hard, crusty mess and let’s face it, some dishes would get burnt before completely cooking thoroughly without foil. But above all, the reason I love foil is the ease of its clean-up. Despite our friendship foil, I love you because I can throw you away.

    Thank you, foil. Thank you.

    Creative uses for foil outside the kitchen

    Creative uses for foil outside the kitchen

    Leave a comment

    Filed under Kitchen Supplies 101